
Secure Liquibase Migrations with Fargate and VPC endpoints
Database versioning allows teams to maintain consistency within environments and encourage collaboration by enabling multiple developers to work on …

Here is a stock photo of Octocat and Groot I found, cause GitHub and S3 (S-Tree, get it? no? okay).
S3 stands for Simple Storage Service, as its name suggests, it’s Amazon’s storage offering that is fully managed and highly scalable service in terms of availability, performance and sheer size. It allows you to store and retrieve flat files, blobs or objects via simple key-value interface without ever needing to provision a drive, setup a file system and so on.
One of the unique features of Amazon S3 is static site hosting, that allows it to serve (static?) web applications to users, essentially making S3 as an endpoint for a website.
Note
Prerequisites:
The first thing we’re going to do is to create our S3 bucket. Head over to your AWS Console and Go to the S3 Management Console and simply click on Create bucket.
Next, you’ll have to provide a unique bucket name, and this should be unique across all AWS accounts in all AWS regions (See complete bucket naming rules here). The bucket name you create must match the domain you want to deploy your website (when using CloudFront, this is no longer necessary but we’ll get to that later on).
It is recommended as well to create your bucket in the region that is closest to you (or your target viewers). Again CloudFront solves this problem later on.
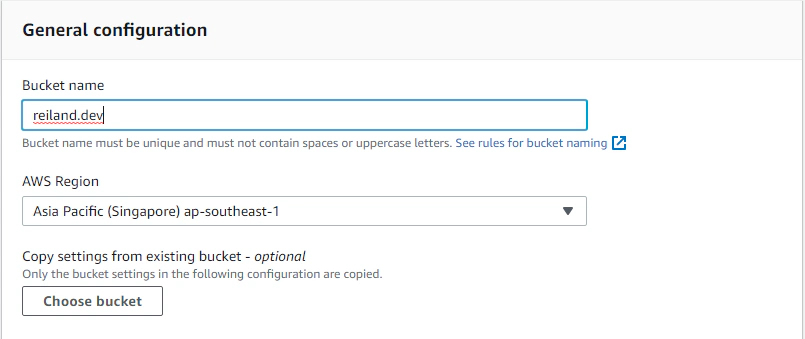
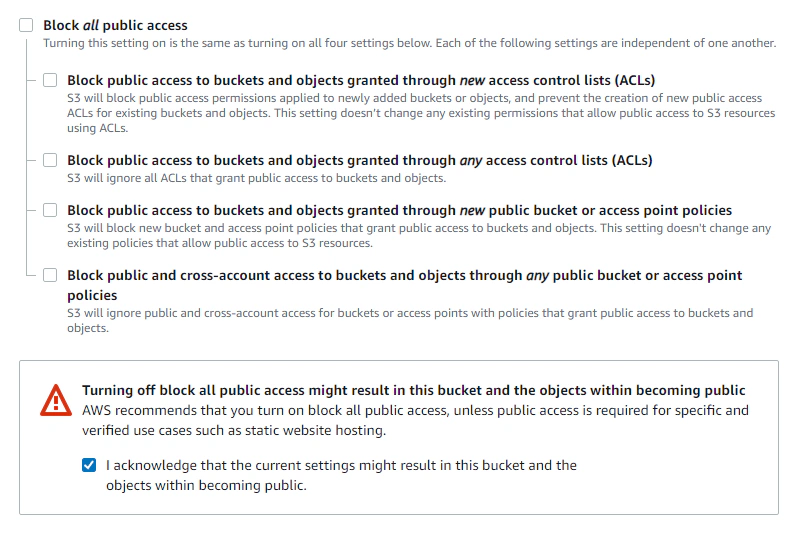
Then you have to allow public access to your S3 bucket by unticking the Block all public access setting and ticking the acknowledgement section. This allows us to allow objects to be set to public.
Then we need to ensure that the objects inside our bucket is publicly readable (or servable) so that our webpage loads when the index.html is requested for example. We can do this by adding a Bucket Policy.
To write this policy, we go to Permissions tab and under Bucket Policy, click on Edit button and paste the snippet below, replacing <YOUR-BUCKET-NAME> with the unique name we assigned earlier on.
 1{
 2    "Version": "2012-10-17",
 3    "Statement": [
 4        {
 5            "Sid": "PublicRead",
 6            "Effect": "Allow",
 7            "Principal": "*",
 8            "Action": "s3:GetObject",
 9            "Resource": "arn:aws:s3:::<YOUR-BUCKET-NAME>/*"
10        }
11    ]
12}
To finish setting up our bucket, we now enable the static site hosting feature of S3. Coming from the bucket root page, under Properties, scroll all the way down and find Static website hosting section and click on Edit.
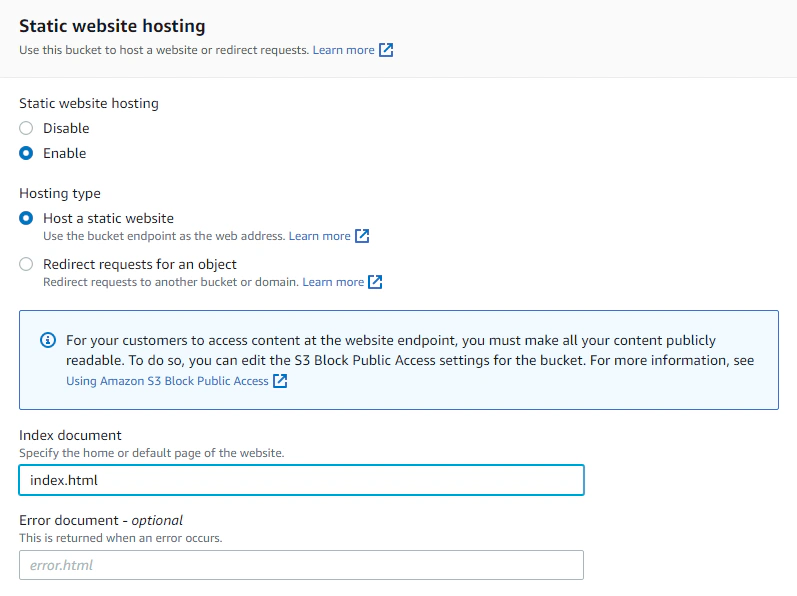
Set all the options to enable the static website hosting. One important thing to note is the Index document, this will be the initial/default landing page of your site. Most frameworks/tools use index.html as a convention but this can be specified differently. Hit Save Changes and our bucket is now ready to serve our static pages. Viewing the same section of the tab, we can take note of our website endpoint.
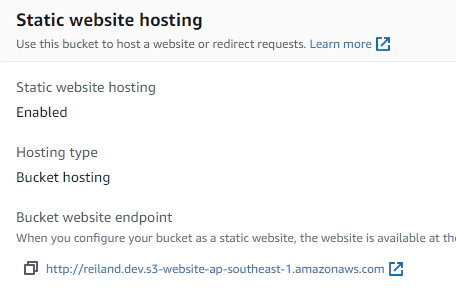
Now that we’ve successfully setup our S3 bucket, obviously we can upload a sample index.html with a simple html code or plain text in it but that would be too underwhelming.
Since Amazon S3 only offers static site hosting, this means we can only deploy web applications with fixed content that can be delivered exactly as it was stored in S3. This means we cannot upload dynamic code that requires some sort of server-side run time environment (e.g. PHP).
For this, we can do it the hard way and use popular JS frontend frameworks like React / Angular (which I’m not gonna recommend) but then we’ll have to update our code everytime we create a new post or article. Or we could use a static site generator, which behaves like a CMS that can generate pages using pre-built layouts and templates and allow us to generate content only by creating Markdown documents.
Some of the most popular static site gemerators are :
All of them are good, but I personally chose Hugo for creating this site. We’re not gonna go through setting this up in this post (but should you decide to create one yourself, check it out here.). I’ve personally decided to use the bookworm-light theme. After setting up our Hugo project and importing themes etc., simply running

will generate the built/minified static assets (html, js, css, images etc.) that’s essentially our website. The command generates these assets in the public folder. We can now simply the contents of the entire directory to the root of our S3 bucket. Simply navigate to our Bucket and hit the Upload button, and then simply drag the contents of the entire public folder across the drop box button in the S3 console - this allows batch uploading of all files and folders in a specified directory.
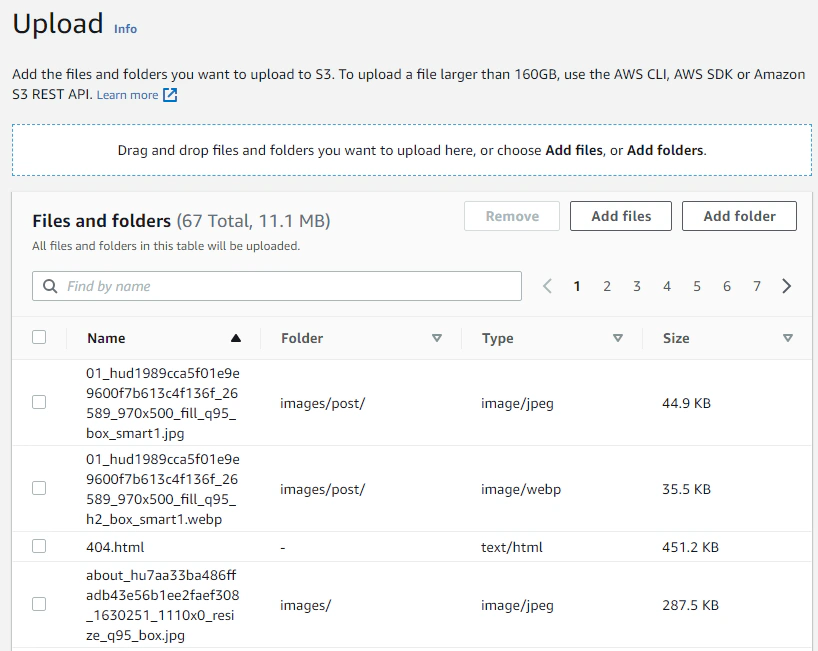
Scroll all the way down and hit the Upload button. Then after everything is uploaded, we can now check out our static site on the s3 website endpoint we took note of early on.
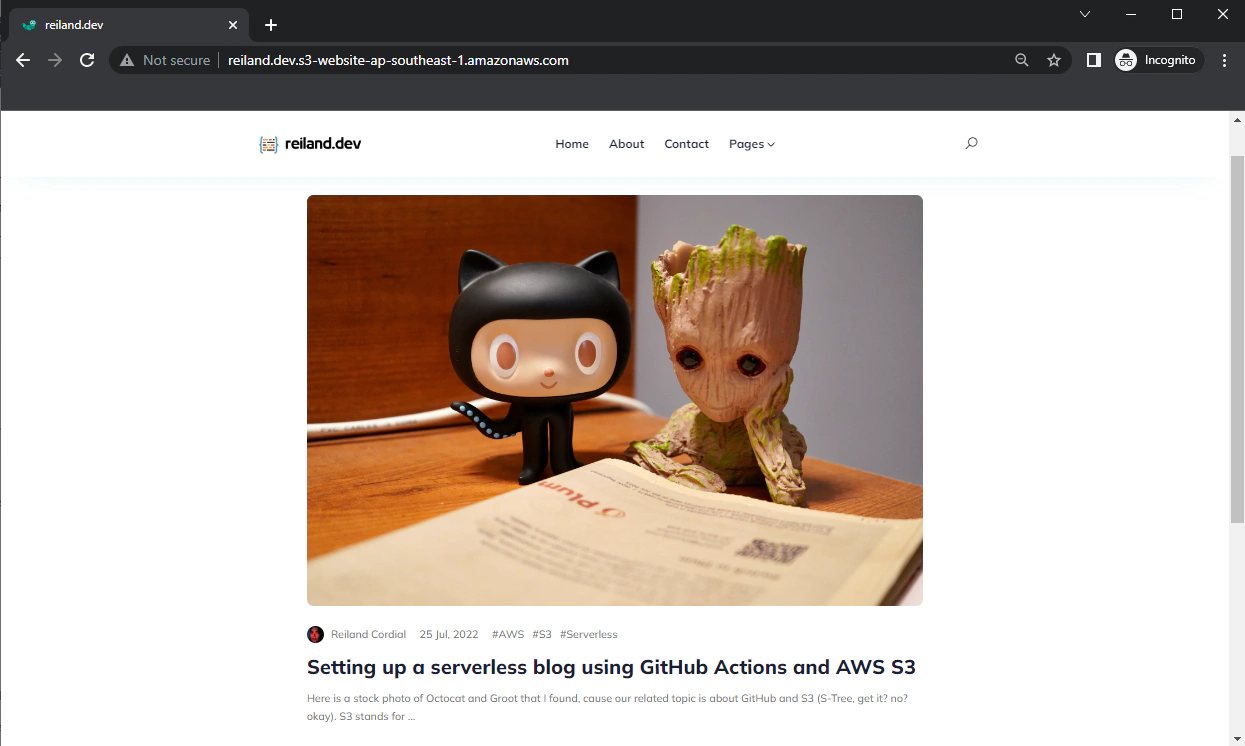
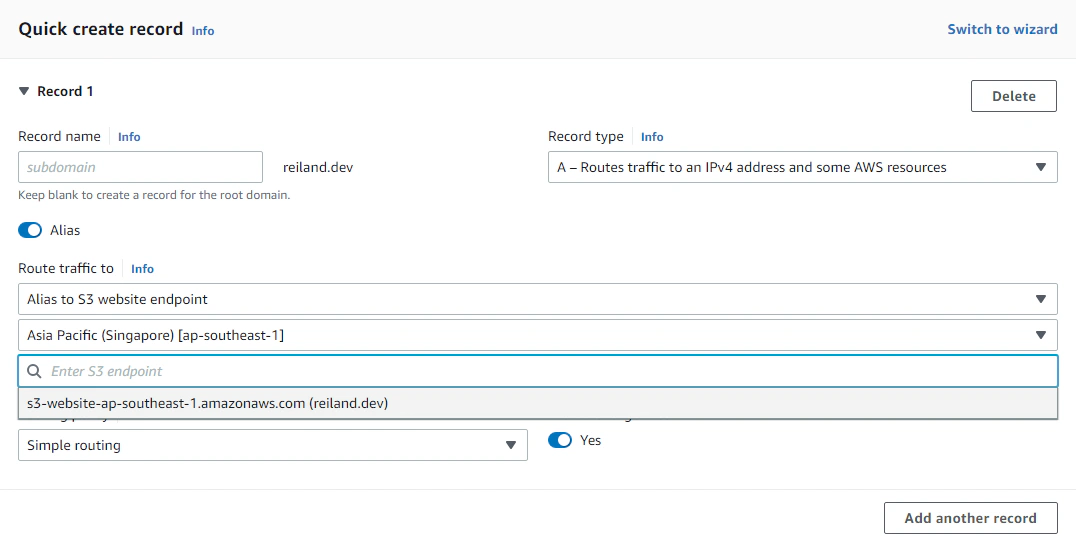
Our website is up, but the URL isn’t exactly friendly nor remarkable. So let’s head on to Route 53 and assuming you’ve purchased already setup a hosted zone and updated your DNS records in your registrar (if you bought from Route 53, a hosted zone is automatically configured).
Inside our hosted zone, create an Alias record that points to our S3 website endpoint. Hit Create Records. After route 53 has propagated our DNS record, our website should eventually be accessible through our domain. In my case it’s under reiland.dev url.
Info
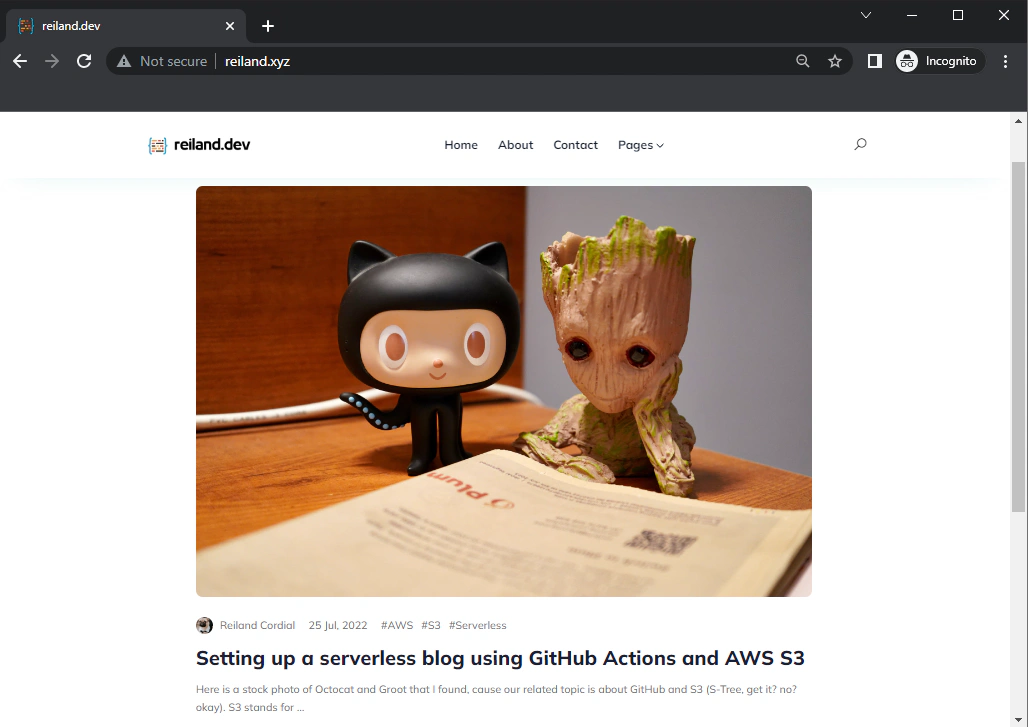
Note that the .dev tld/extension is a secure namespace, which means all things deployed under it will require an SSL Certificate installed on the website, essentially making our website HTTPS only.
Since by default, S3-bucket hosted sites are not SSL-enabled, we won’t be able to access it even after mapping it to our .dev domain (but we will solve this later on). So, trying it out with my spare domain reiland.xyz (after re-creating everything), results to :
Lastly, we want to automate our deployment process so that everytime we update a page or add a new post, we don’t have to go run the hugo command, login to our AWS console, find our S3 bucket and then re-upload all the updated assets.
We can do this by setting up a simple CI/CD that builds our hugo project and updates the objects inside our S3 bucket using GitHub Actions.
For GitHub Actions to push objects to S3, we need to create an IAM user with limited privileges that only allows it to read and write objects to our S3 bucket. Go to IAM in the AWS management console and create a user.
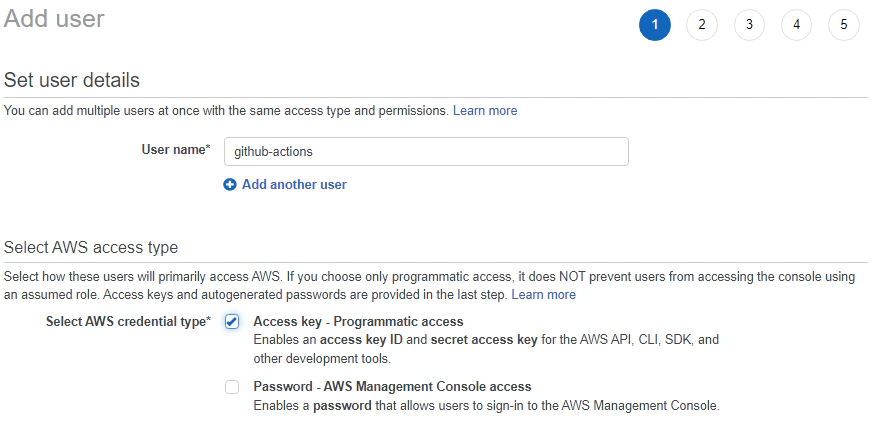
For simplicity, we can attach the AmazonS3FullAccess policy directly to our user. But note that this may not be the best practice as GitHub Actions only require a set of specific permissions for it to work, and we should always apply the principle of least privilege when granting access to our AWS environment.

Hit next, and create the user while taking note of the Access Key ID and Secret Access Key, which we’re going to use in the next step.

Now, assuming we have our hugo project in GitHub. We can now give GitHub Actions the appropriate credentials for our pipeline to have the ability to write objects to our S3 bucket, and to do this we’ll go to our repo page, and under Settings tab, click on Secrets menu item.
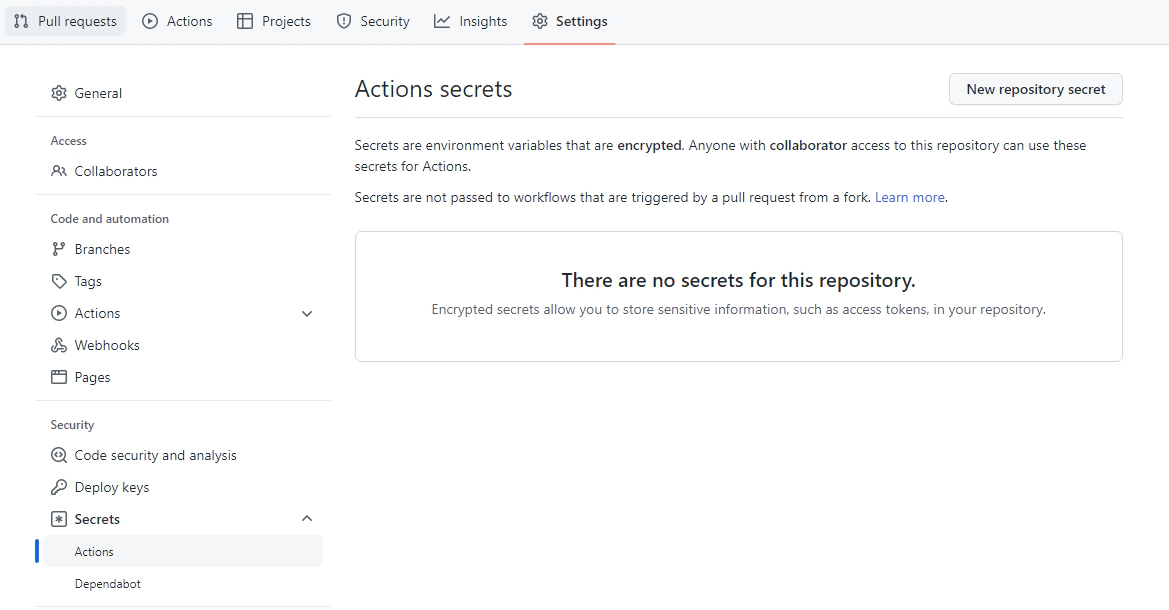
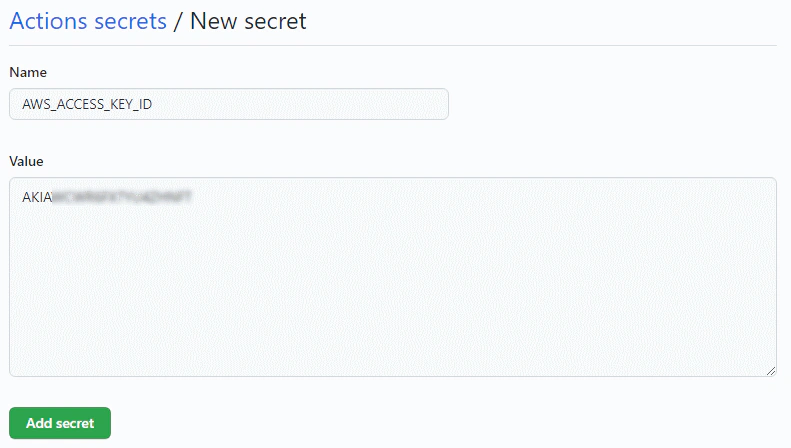
Then create a New repository secret. We will then create three new secrets namely AWS_ACCESS_KEY_ID, AWS_SECRET_ACCESS_KEY, and AWS_DEFAULT_REGION with their values from the AWS credentials we took note of respectively, and putting the default region the same as the region code of the bucket we created. My bucket was in ap-southeast-1. These credentials are then going to be retrieved by our AWS CLI when our build step runs.
While still in the repo page, go to Actions, and hit setup a workflow yourself. Then paste the basic YAML code below to the file editor.
 1name: Hugo Continous Integration
 2
 3# Controls when the workflow will run
 4on:
 5  # Triggers the workflow everytime a push is made to the master branch
 6  push:
 7    branches: [ "master" ]
 8
 9jobs:
10  # Simple workflow example to build and push to s3
11  hugo_s3:
12    # The type of runner that the job will run on
13    runs-on: ubuntu-latest
14
15    steps:
16      # Check out repository under $GITHUB_WORKSPACE, so your job can access it, include submodules as well (themes installed etc.)
17      - uses: actions/checkout@v3
18        with:
19          submodules: 'true'
20
21      # Run script to install and run hugo
22      - name: Install Hugo
23        run: sudo snap install hugo --channel=extended && hugo
24
25      # Configure aws using a pre-built action in the marketplace
26      - name: Configure AWS Credentials
27        uses: aws-actions/configure-aws-credentials@v1
28        with:
29          aws-access-key-id: ${{ secrets.AWS_ACCESS_KEY_ID }}
30          aws-secret-access-key: ${{ secrets.AWS_SECRET_ACCESS_KEY }}
31          aws-region: ${{ secrets.AWS_DEFAULT_REGION }}
32
33      # Command to push the objects built by hugo to our S3 bucket
34      - name: Push Hugo assets to Amazon S3
35        run: cd public && aws s3 sync . s3://reiland.dev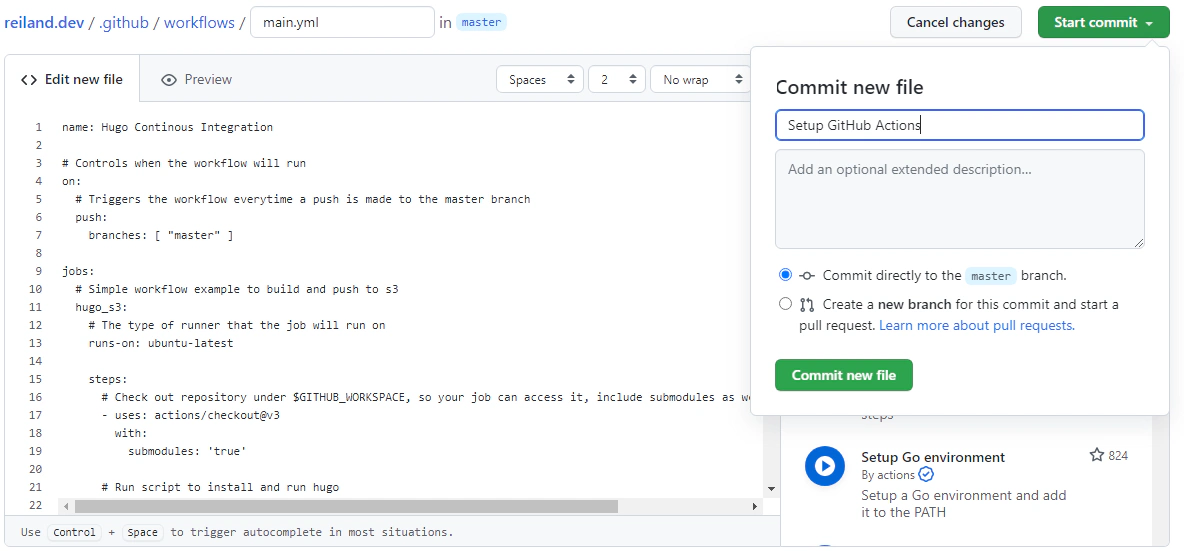
What this workflow does is to use the ubuntu-latest image, install hugo, add the aws cli as well as configure the required credentials, then ultimately push the files inside the public folder to our S3 bucket.
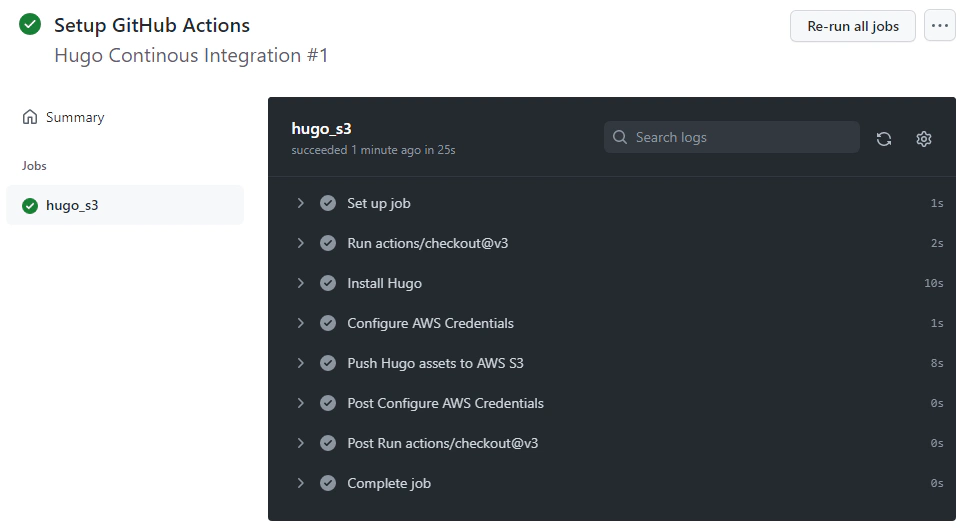
If configured properly, we should be able to check the status for each step and see that it completes, we can then take a look at our website endpoint if the updates were successfully added.
- We setup an S3 bucket, configure it for public read and static hosting
- Mapped our domain name and given our static site a friendly URL
- Implemented an entire blogging workflow from writing content in the form of markdowns to having it publicly deployed in the web and effectively automating the entire process.
- The entire setup is serverless, no requests to your site = no bill (except storage fees for the files, which is miniscule)

Database versioning allows teams to maintain consistency within environments and encourage collaboration by enabling multiple developers to work on …

Amazon Virtual Private Cloud (VPC), allows you to create secure and logically isolated networked environments where you can deploy private …