
Setting up a CICD workflow for serverless blogging using GitHub Actions and Amazon S3
Here is a stock photo of Octocat and Groot I found, cause GitHub and S3 (S-Tree, get it? no? okay). S3 stands for Simple Storage Service, as its name …

Amazon CloudFront is a service comprised of a network of AWS data centers termed as Edge Locations across the world primarily used to deliver content closest to the users. It works by creating a request to the origin on behalf of users instead them directly accessing the origin, and later on caching that same content for faster delivery to subsequent requests.
In a previous post, we setup a serverless website using S3 static hosting feature and mapped a domain name using Route 53. And while it’s not really a transactional application that deals with passing and storing sensitive data, running an insecure site receives an SEO penalty, plus browsers rub it in you by putting a Not secure tag.
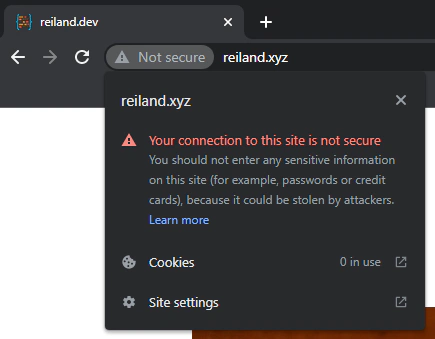
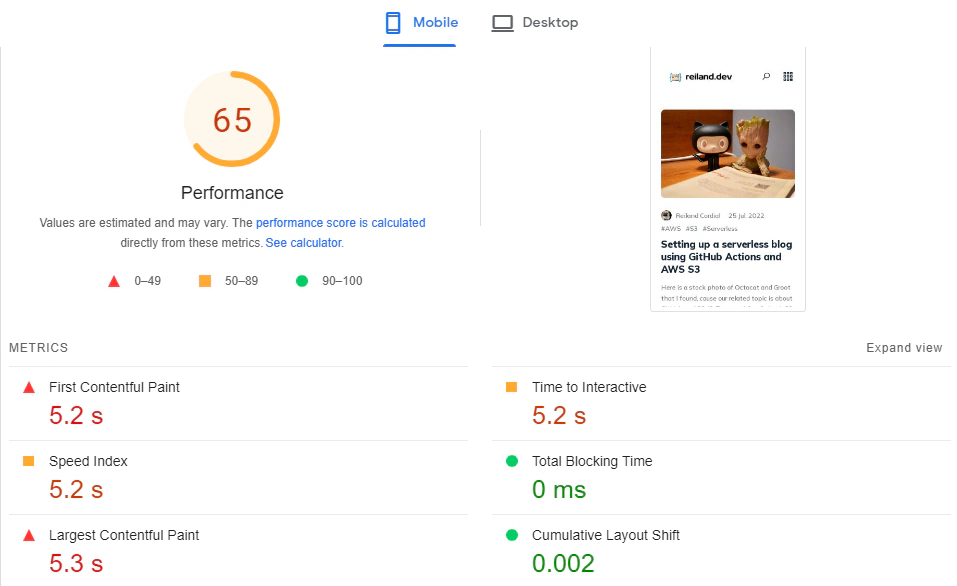
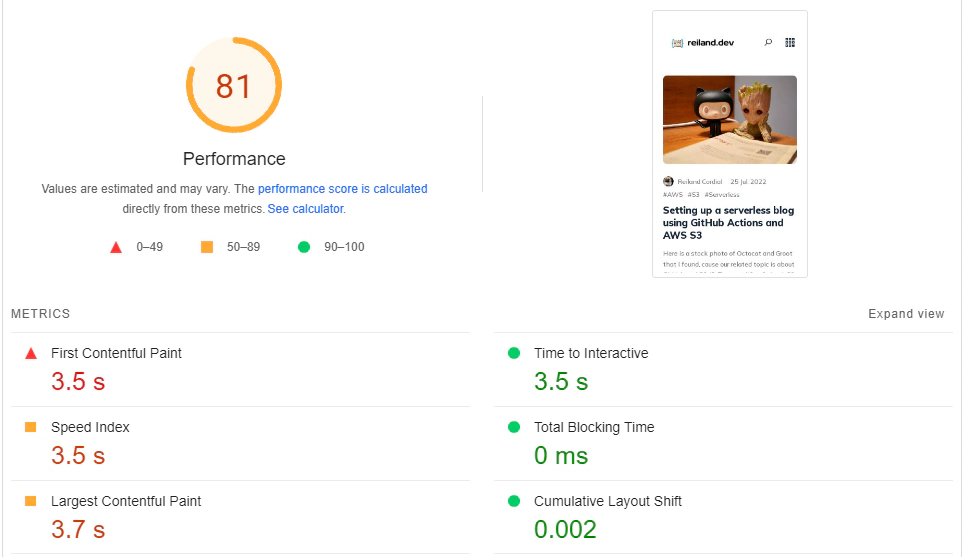
On top of the insecure tag, S3 by its own is not really optimal. A quick test on google PageSpeed Insights immediately tells us that the performance of our site is poor, such that it takes 5.2 seconds for our site to be interactive.
The first step to enable HTTPS is to request an SSL certificate from AWS Certificate Manager (ACM). Head to the the AWS management console, and as required by AWS, we need to switch our region to N. Virginia (us-east-1) first, then go to Certificate Manager, and click on Request a public certificate.

Tip
ACM allows us to use wildcard names, which enables us to reuse the certificate with multiple sites under the same domain (e.g. test.reiland.dev, or staging.reiland.dev)
Then we’ll choose DNS for the validation method. This allows ACM to verify our domain ownership by taking a look at certain DNS records it will provide for us.

After hitting Request. Let’s go ahead and view our certificate, and we should see that the status is Pending validation. Scroll down, and under the Domains section, we’ll click on Create records in Route 53.
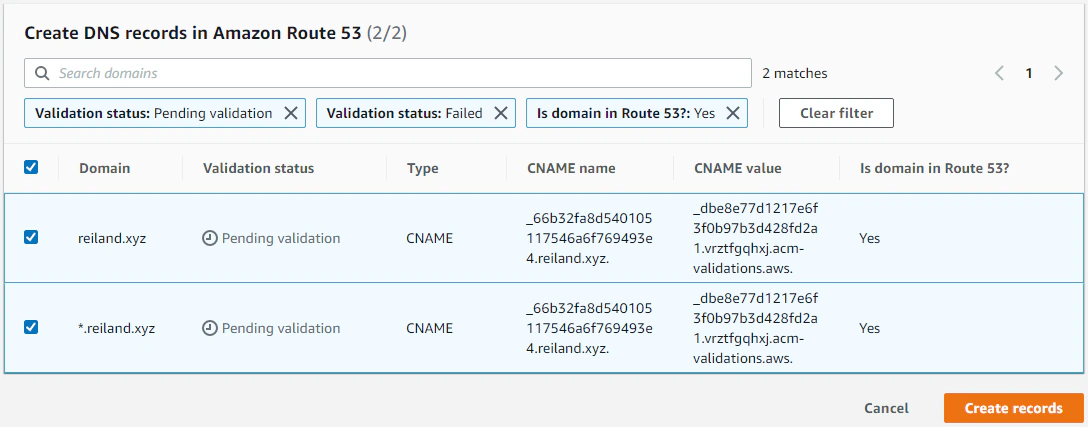
This will create the CNAME records that ACM will use to validate our domain. This will take a few minutes, but after a while we should be able to see that the status is now updated to Issued. We are now ready to use the newly issued SSL certificate with our CloudFront distribution.

To properly wrap up our setup, we’re going to create an Amazon CloudFront distribution in front of our S3 bucket and enable HTTPS by using the provisioned SSL certificate we requested from ACM.
While still in the AWS console, let’s find the CloudFront service. Click on Create Distribution, and let’s setup our distribution. Under the Origin section, take note that the origin that we specify must be the bucket website endpoint generated for us and not the bucket URI.
Wrong:

Correct:

We can leave everything as default for now, but it is better to set the Viewer protocol policy to Redirect HTTP to HTTPS, so that even when our viewers try to access our HTTP version of the site, they will be automatically redirected to HTTPS.
But under the Settings section, we can choose the price class (I’m leaving this as the default for now), and specify our Alternate domain name as our domain, and the SSL certificate to be the one we provisioned from ACM.
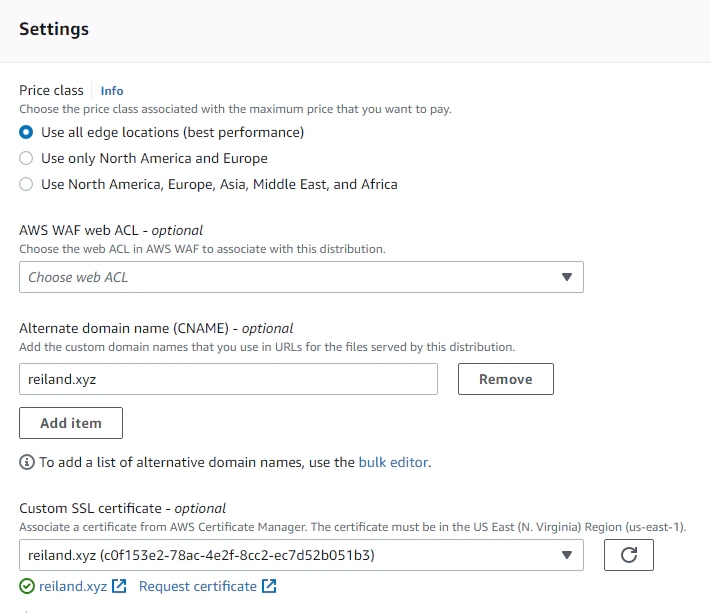
We can again set everything as default and hit Create distribution, this will take some time to provision. When done, we can try out if our distribution works by checking out the generated cloudfront endpoint for us.

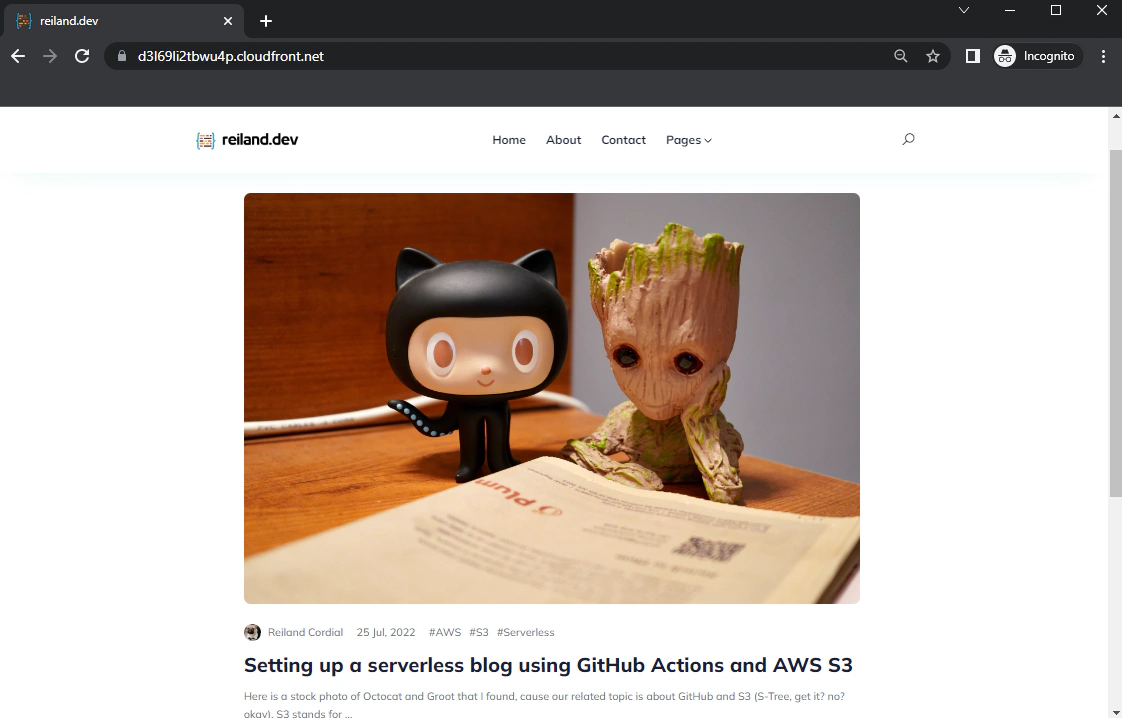
It runs fast, it runs in HTTPS but why the bad URL? This is because we still have one more step left, and that is to update our DNS record for our domain name to point to the CloudFront distribution instead of our S3 bucket. We’ll just have to go back to Route 53, find our domain name and update our DNS record to point to our distribution.
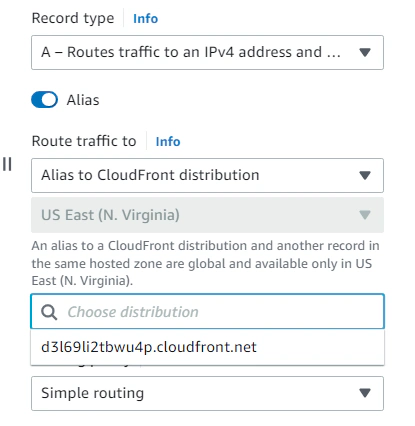
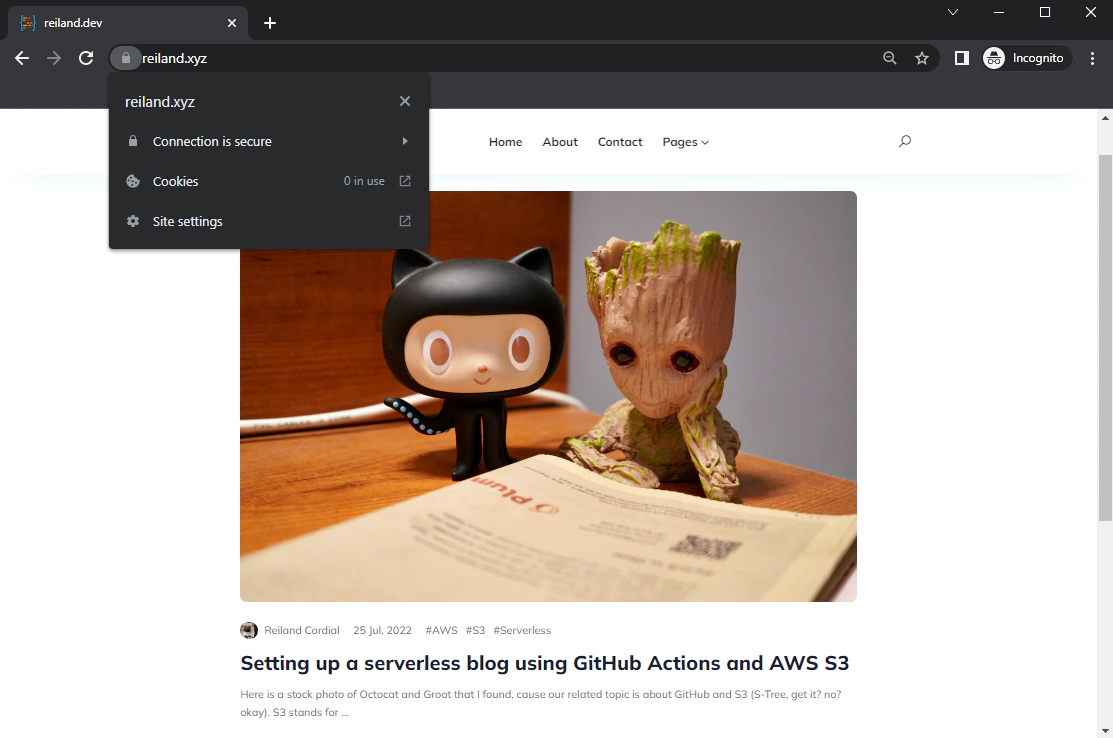
Hooray! We have now successfully enabled HTTPS and set up a CloudFront distribution to deliver our site in the fastest way possible.
Testing it out again in google PageSpeed Insights, we’ll find that our CloudFront-distributed website performs a whole lot better with a performance score of 81 and a time to interactive of 3.5s from our previous 5.2s when directly accessing S3.
- We have created a free SSL certificate with ACM
- Setup a cloudfront distribution in front of our S3-hosted website
- Improved overall site performance - obviously, the score could have been better, but there are a lot of factors influencing page load times (heavy js, unoptimized image sizes, etc.) but we’ve seen visibly how setting up a distribution helps.

Here is a stock photo of Octocat and Groot I found, cause GitHub and S3 (S-Tree, get it? no? okay). S3 stands for Simple Storage Service, as its name …

Database versioning allows teams to maintain consistency within environments and encourage collaboration by enabling multiple developers to work on …