
Accelerating S3-hosted static websites
Amazon CloudFront is a service comprised of a network of AWS data centers termed as Edge Locations across the world primarily used to deliver content …

Amazon Virtual Private Cloud (VPC), allows you to create secure and logically isolated networked environments where you can deploy private applications into. It allows you to divide your network into subnets, define CIDR ranges, and control traffic flow using a variety of traffic control utilities like Network Access Control Lists (NACLs), Security Groups and Route Tables.
The challenge now is how to securely provide access to the resources inside the VPC without ever exposing them to the public, this is where VPN appliances come in.
One obvious answer here would be to configure something like AWS Client VPN which is a fully managed OpenVPN-based service, then you can configure your resources to lock down access through it. Only thing that keeps me away from touching it is its not-exactly-encouraging pricing.
Current pricing model involves a fixed hourly cost for a client VPN endpoint plus the connection duration used by VPN clients, also billed hourly. As of the time of writing, in the ap-southeast-1 region, an example of 5 users connecting for an average of 8 hours per day for 22 working days a month would incur a cost of 153 USD. But that is only for a single subnet association / target network, adding another subnet association requires an entirely new endpoint, slapping you with another fixed hourly bill. This would be especially pricey for multi-az, high availability setups.
Other than cost, there is no inherent disadvantage to AWS VPN. In fact, utilizing managed services as much as possible is considered best practice as you would never have to worry about availability, scalability, or the operational overhead that comes with self-hosting - it just works.
Ulitimately, the decision for choosing between self-managed and AWS-managed services will have to be driven by cost, scale and security/compliance requirements. But as an alternative, you can self-host your own VPN solution using open source appliances like Wireguard. I have personally grown to love Wireguard and is my go-to VPN solution for locking down simple environments both for personal projects and small clients.
In this post, I’ll give a walkthrough on how I created a boilerplate for quickly setting up a Wireguard-tunneled Amazon VPC to access private resources with custom domains using Route 53 private zones. As a reference, we will be creating the architecture in the diagram below:
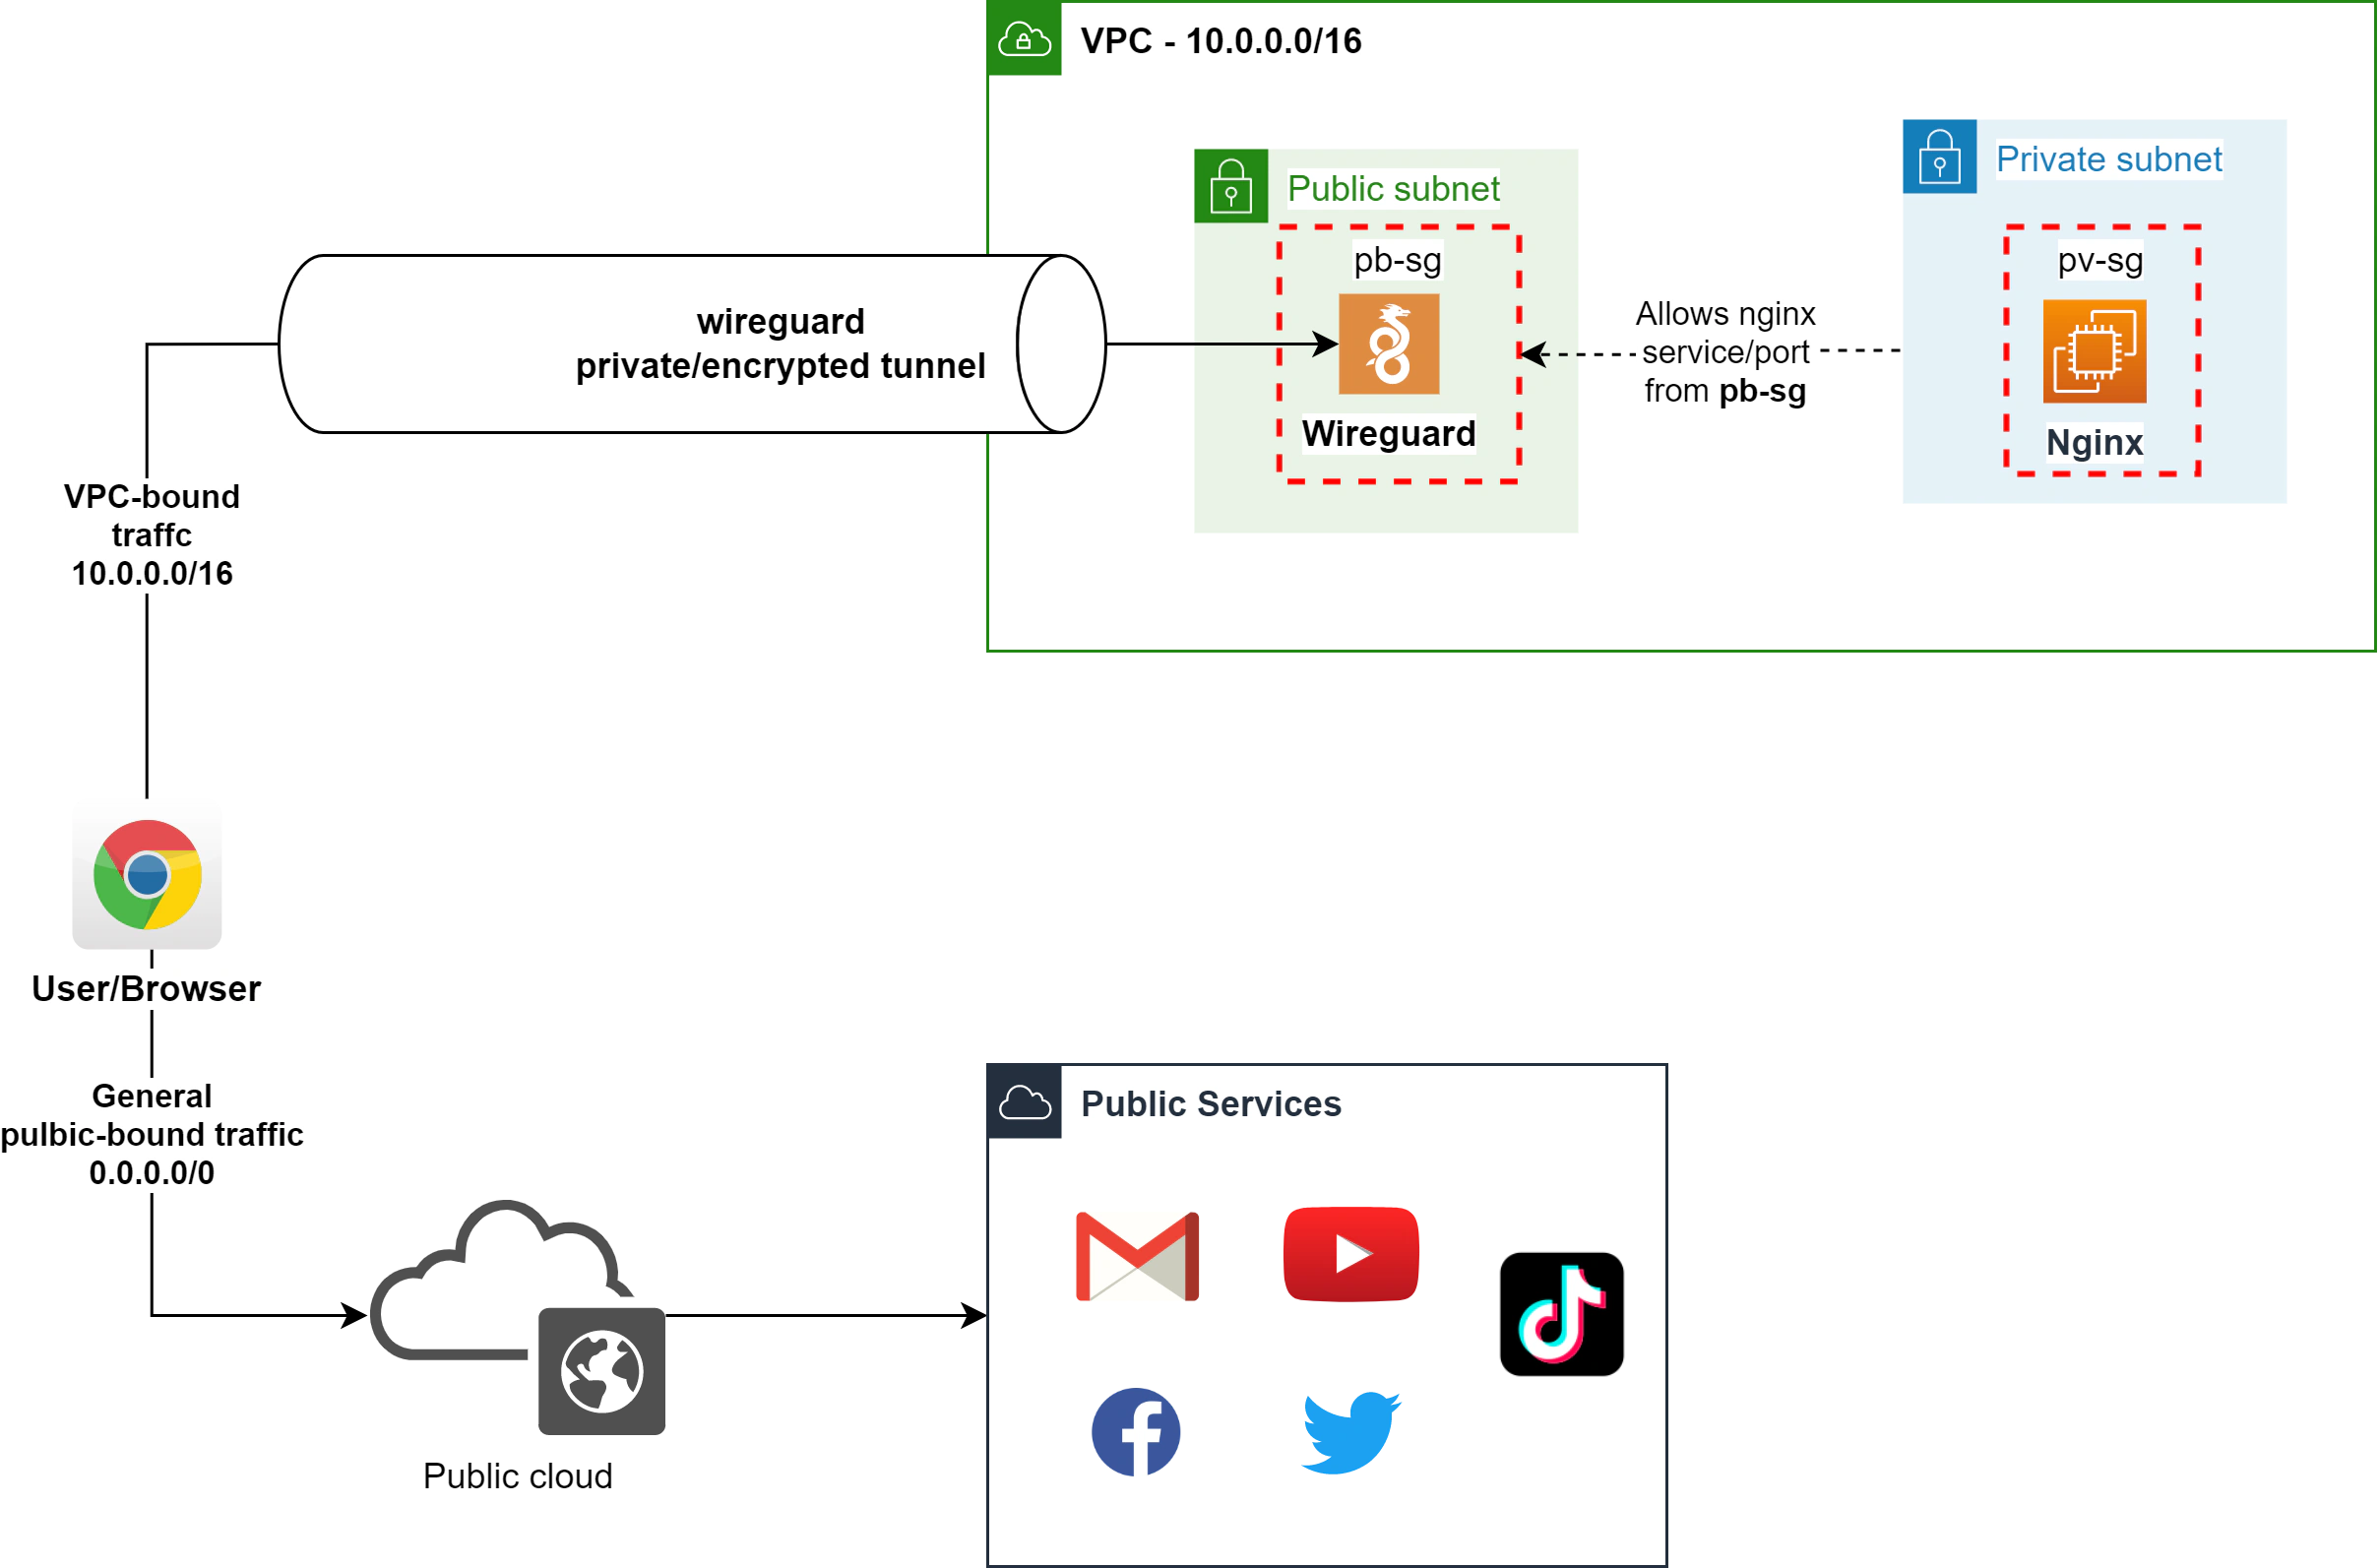
To speed things up, I wrote the Cloudformation templates below. The project includes stacks that are nested to separate the VPC / network stack from the Wireguard / NGINX application stack.
We will be utilizing the wireguard-nginx-servers.yml cloudformation stack. However, this requires a nested stack one-az-vpc-template.yml that must be first uploaded in an S3 bucket. Alternatively, you can utilize ha-vpc-template.yml to provision a much more highly-available network stack (3 public, private subnets with NATGW in each public subnet spread in 3 AZs). Then you need to update the template reference TemplateURL property, like below:
16  VPCStack:
17    Type: AWS::CloudFormation::Stack
18    Properties:
19      Parameters:
20        VPCName: One AZ Stack
21      TemplateURL: "<---one-az-vpc-template-stack.yml--->"
Assuming you have a properly configured AWS CLI and the appropriate IAM permissions required, we can simply launch the stack by executing something like:
aws cloudformation deploy --template-file wireguard-nginx-servers.yml --stack-name vpc-wg-demo --parameter-overrides WireguardPassword=wireguarddemo --region ap-southeast-1A parameter override is provided here for WireguardPassword - this is to specify an initial password to access the Wireguard managment GUI where you can create VPN client profiles.
This will create both the network stack and the wireguard/application stack. The network stack should output the IDs of the VPC and subnets, and the application stack should return the public IP of the wireguard instance and the private IP of the privately deployed NGINX sample application.
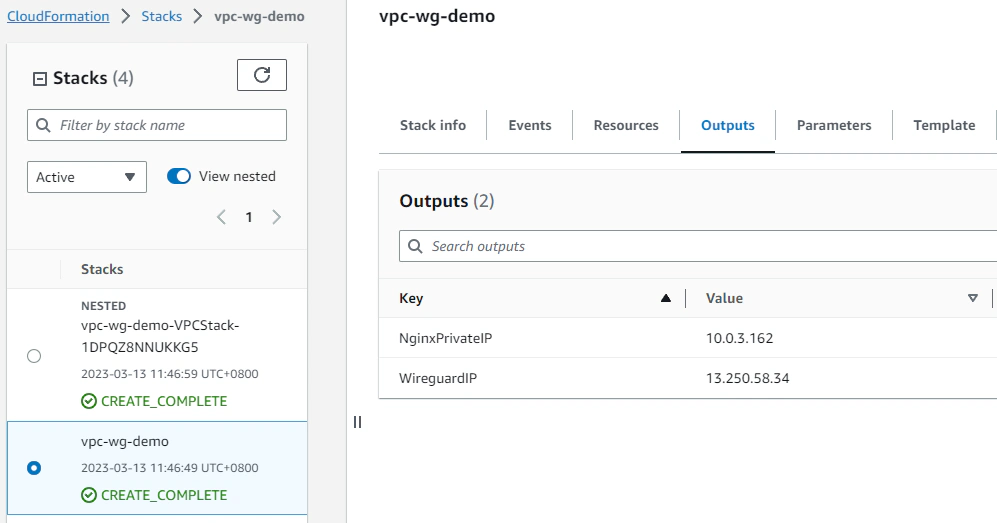
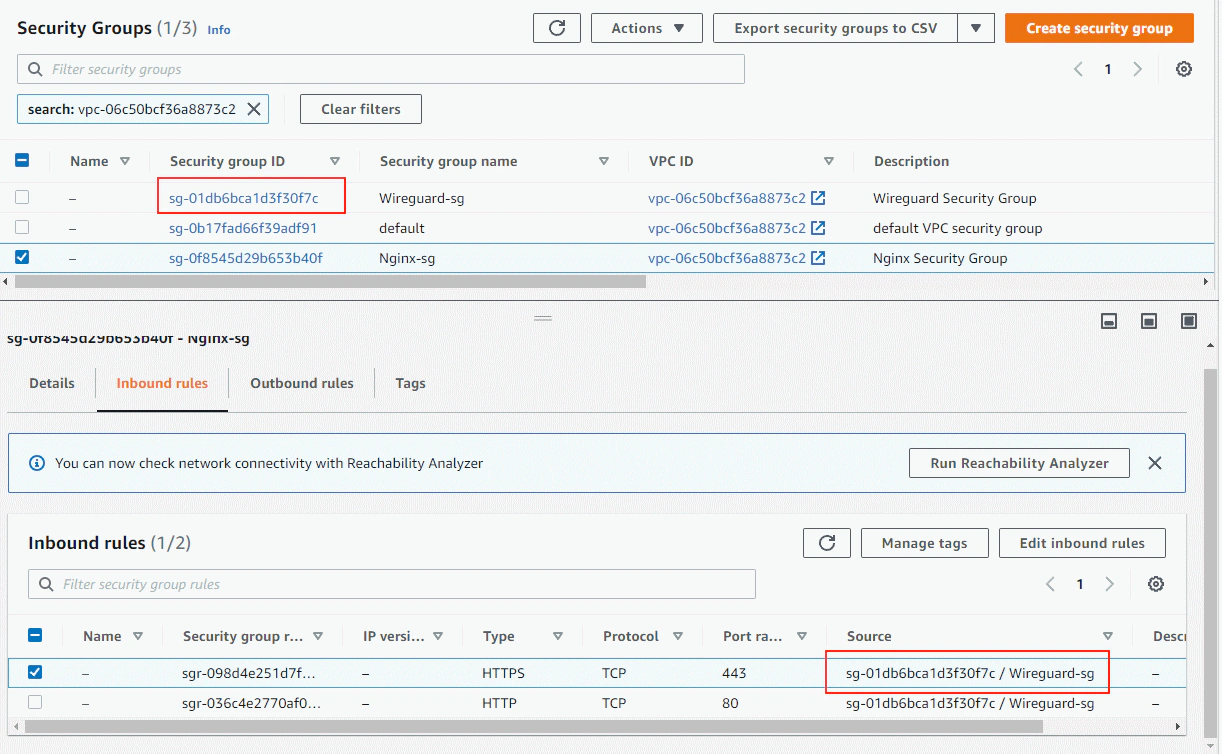
Obviously, trying to access the application at 10.0.3.162 at this point is not gonna result to anything as the application does not have any inbound route and no public IP address. Furthermore, it has an attached security group with an inbound rule only to allow traffic from a referenced security group of the Wireguard instance. I’ll be talking about each of the components in each stack in the succeeding paragraphs.
Following and using the one-az-vpc-template.yml, this will create a simple VPC with two subnets - private and public, and a NAT Gateway in the public subnet with route out to the internet through the NATGW. The VPC address is 10.0.0.0/16 with the private and public subnet being 10.0.0.0/24 and 10.0.3.0/24 respectively.
The parent stack wireguard-nginx-servers.yml will deploy an EC2 instance in the public subnet running a Wireguard docker container using weejewel/wg-easy to simplify the wireguard configuration process. Simultaneously it also creates another EC2 instance in the private subnet that serves as our private application running an NGINX web server.
Another thing that the stack creates are security groups for both the Wireguard instance and the Nginx application server. The Nginx-sg will allow HTTP/HTTPS traffic only when the source comes from the referenced security group (Wireguard-sg). We could obviously make this more flexible to allow traffic from the entire public subnet CIDR address range or the entire VPC address instead.
Note that referencing security groups do not work when using public IPs to communicate.
Taking note of the public IP address of the wireguard instance, we can simply paste it in the browser and access the wireguard management web gui in port 51821 - this is just the default port, but we can change this to 80 or a more standard web port.
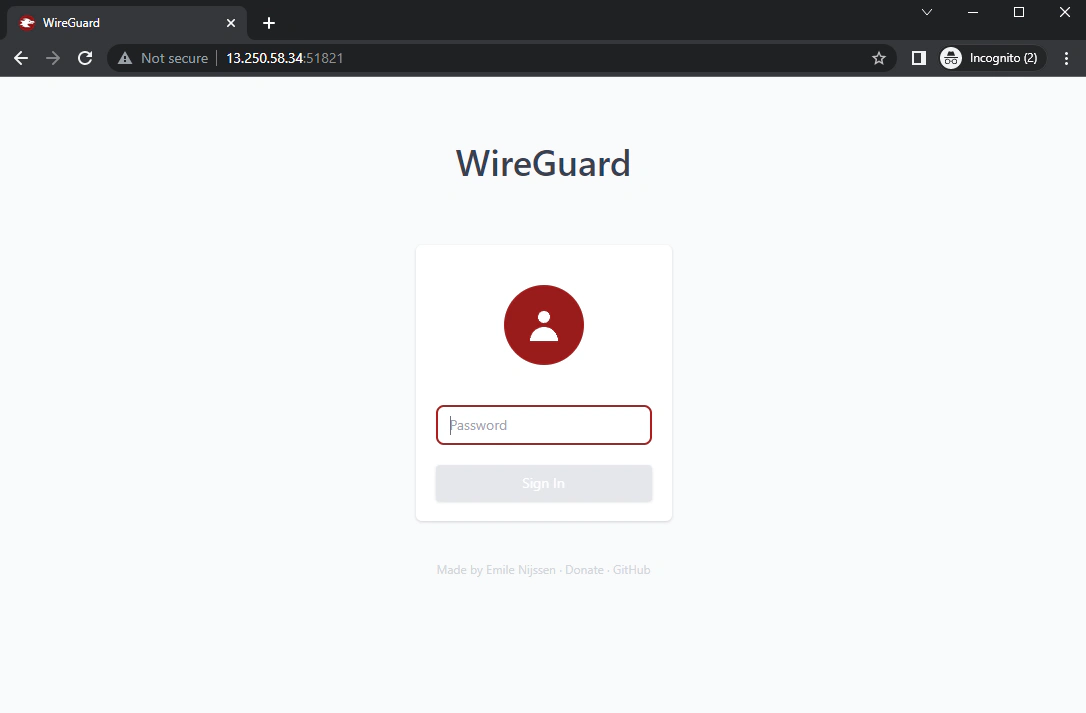
We can access this using the password (wireguarddemo) we set earlier when we first launched our Cloudformation stack and provided the --parameter-overrides flag.
After logging in, we can simply create a VPN client profile and download the configuration file containing our public and private key.
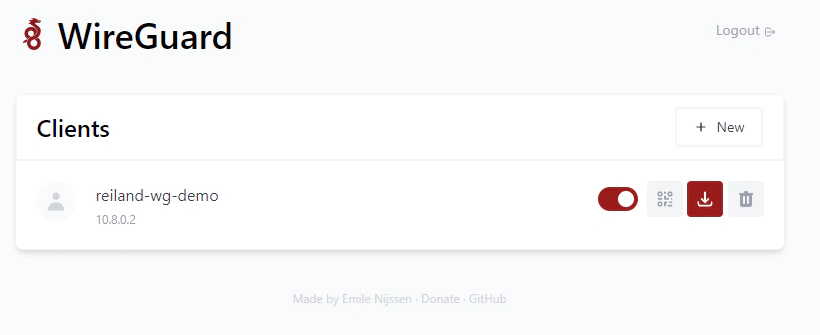
We can import the downloaded configuration file to our Wireguard client. If you do not have the Wireguard client yet, you can download the client application for the appropriate platform here.
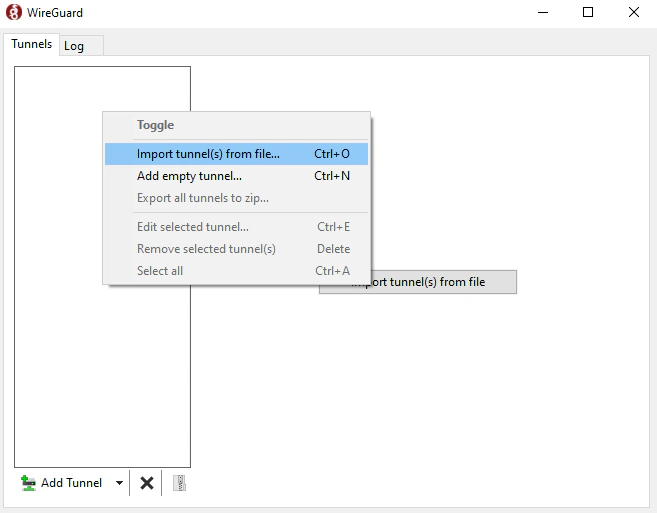
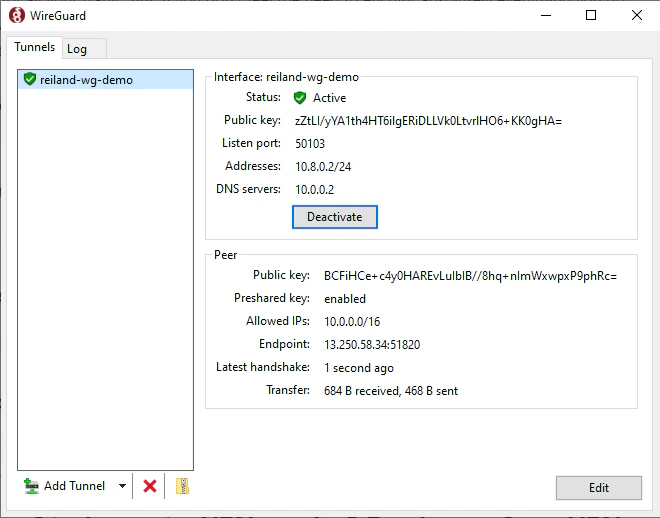
Then we can activate the connection.
Taking note of the output private IP address of the NGINX webserver in the Cloudformation stack we created. We can now privately access the application in 10.0.3.162, and we’ll get this very intuitive and “useful” web application.
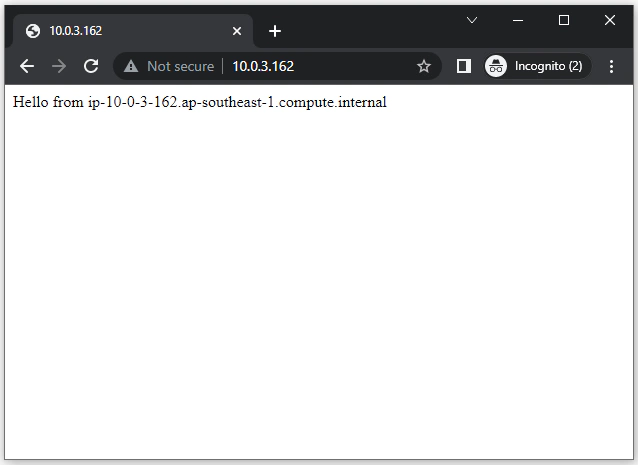
Up to this point, we have now successfully setup an Amazon VPC with a wireguard VPN server and a private sample application.
By now you’ve probably used Route 53 to create custom domains and point DNS records to applications / resources.
But we should note that creating a DNS record in a public hosted zone like my reiland.dev domain to point to a private ip / resource will not work.
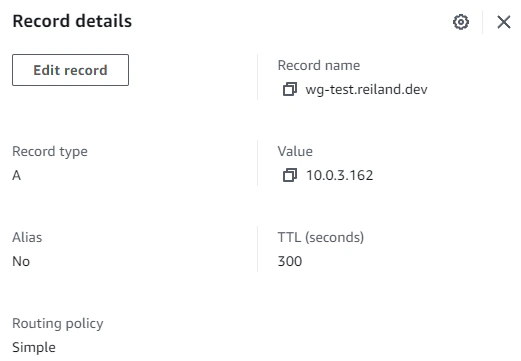
You can try, but you will get a timeout error. This is because private addresses are only routable within the private network and are not reachable from the public internet.
Therefore we need to use Route 53 private hosted zone and create private DNS records if we want to use friendly URLs.
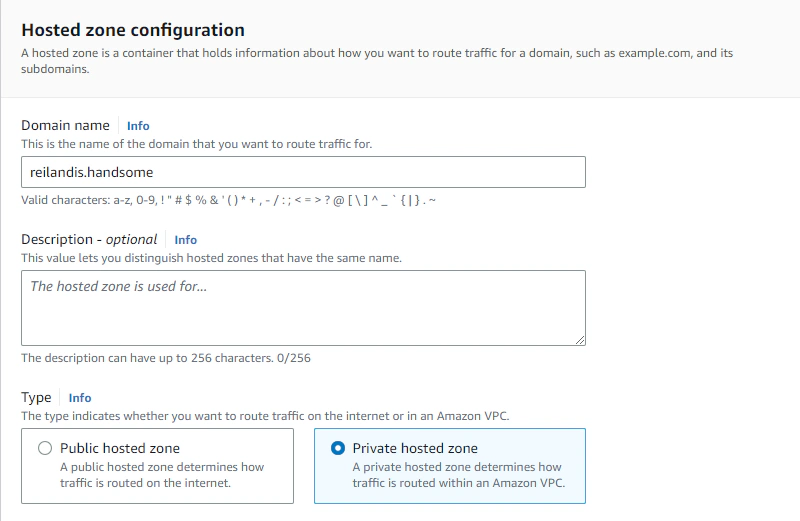
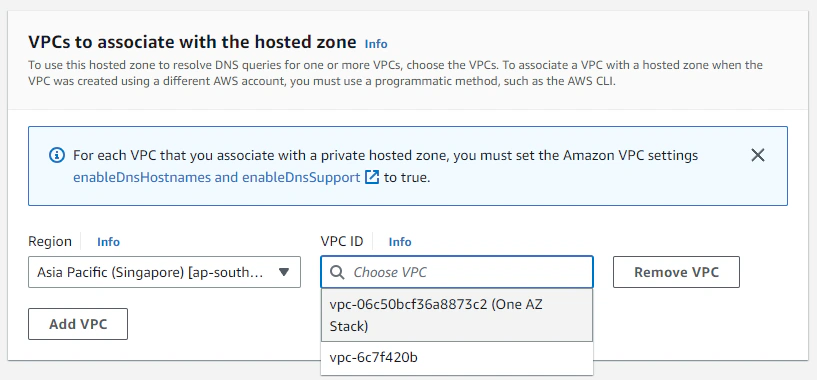
You see, you don’t actually have to own the domain, in fact it doesn’t even have to exist in any domain registrar. The .handsome tld doesn’t even exist anywhere, so go wild and use anything. The only thing to note here is that we need to create the zone in the VPC context, so we need to select our VPC stack when creating the zone.
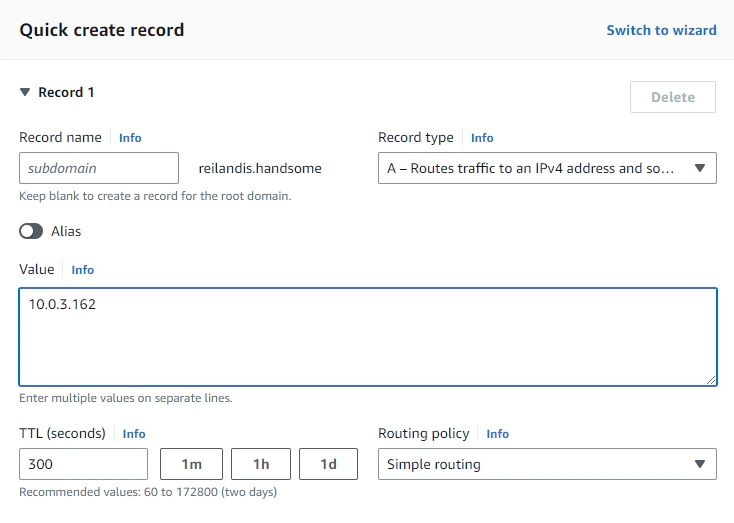
Lastly, we’ll just create an A record type like usual. In this example, I just used the zone apex to point the record to the private Nginx application.
After propagation (probably won’t take long), we can now access our application in http://reilandis.handsome. Note that if you use a tld that isn’t really supported, browsers might treat that as a search query instead. So you should explicitly prefix the url with http://.
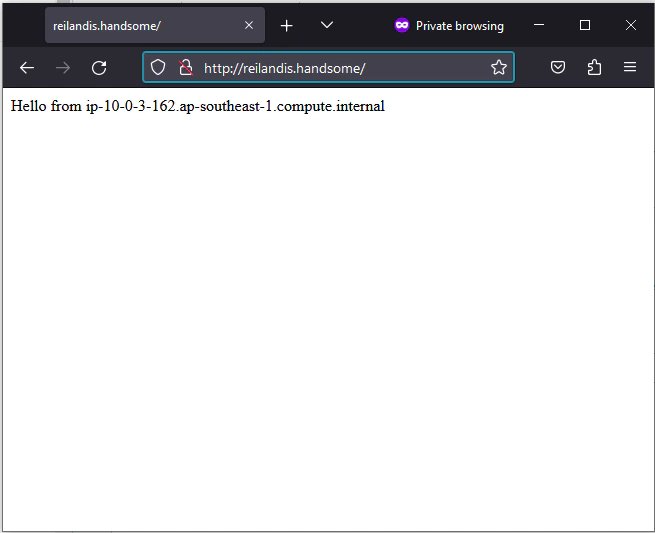
And that’s it. We’ve successfully created a privately deployed application complete with a custom private domain for friendly URL.
There are some important set of configurations here that allowed this solution to work, and here’s two that is noteworthy.
If you take a look at the docker run command for spinning up the Wireguard container, you’ll see that it passes the -e WG_ALLOWED_IPS parameter in the user data script. The parameter for this example is resolved at runtime to the VPC CIDR address range 10.0.0.0/16. This is to setup Wireguard to generate client configurations that tells clients to only route traffic to the VPN appliance when the client requests a resource that is within the address range.
This setting allows a behavior known as Split-tunneling. This means only traffic bound for the VPC is routed through the VPN while other public resource - facebook, google etc. is routed through the clients default network interface.
Setting the Allowed IPs to 0.0.0.0/0 means that all outbound traffic from the client will be routed through the VPN appliance. This makes the Wireguard instance as an exit node and is otherwise known as a full tunnel.
Another Wireguard environment variable that is passed in the same command is -e WG_DEFAULT_DNS. This is resolved at runtime to the VPC DNS server address.
According to the official docs, the VPC DNS server address is always the VPC address plus two. This means a VPC with a network address of 10.0.0.0 will have the DNS server at 10.0.0.2.
Since we are using private hosted zones, and mapping private DNS records to point to our applications, we’ve configured Wireguard to tell clients to use this the DNS server, thus the reason why we can resolve records in our private hosted zone.
- We created a network stack using a Cloudformation
- Provisioned a Wireguard VPN appliance
- Created an application server accessible only through Wireguard
- Utilized Route 53 private hosted zones to access our private resources and put proper configurations for Wireguard client profiles

Amazon CloudFront is a service comprised of a network of AWS data centers termed as Edge Locations across the world primarily used to deliver content …

Here is a stock photo of Octocat and Groot I found, cause GitHub and S3 (S-Tree, get it? no? okay). S3 stands for Simple Storage Service, as its name …