
Secure Liquibase Migrations with Fargate and VPC endpoints
Database versioning allows teams to maintain consistency within environments and encourage collaboration by enabling multiple developers to work on …

Docker provides developers a platform by which multiple individual applications can be packaged in the form of images and later on shipped or instantiated as containers. Furthermore, Docker allows us to treat containers as disposable, re-creatable resources that we can start/stop while having the flexibility to persist data over the container lifecycle, essentially providing portability to applications.
We are then allowed to run different web applications in a single host. Yet while we can create as many container “instances” as we want, we are still limited to the ports that can be exposed by the host machine.
Assuming you have the Docker Engine installed, let’s try running basic containers from a sample docker image I created.
Note
If you are running this remotely in the AWS/cloud provider, you need to ensure you have configured your security groups or firewall to allow access to the ports we’re going to use in this post.
docker run -d -p 8000:3000 -e NAME=service1 reicordial/simple-node-webdocker run -d -p 8001:3000 -e NAME=service2 reicordial/simple-node-webHere we are running them in port 8000 and 8001 mapped to the container in port 3000 which is exposed by the NodeJS application inside (we can change the container port by passing a PORT environment). Each of the container simply outputs the passed NAME parameter, and the host information using the os NodeJS package running os.hostname(), this would output the hostname when run in a VM. In a container, this will return to us the container ID.
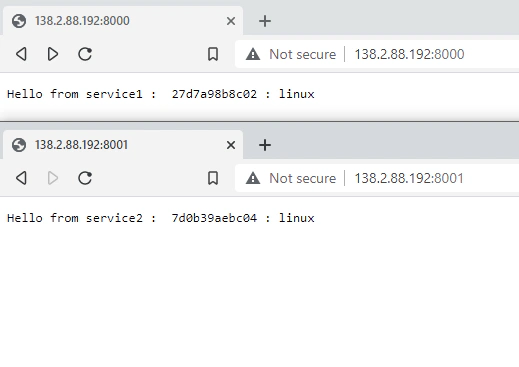
We now have two applications running and see that they are being run by two different containers identified by the NAME we passed and exposed on different ports in the same host.
Then we create the records to map our host to a subdomain. I’m using my trusty reiland.xyz domain as my playground domain for this one. We need to create two A records, (e.g. service1.example.com and service2.example.com).
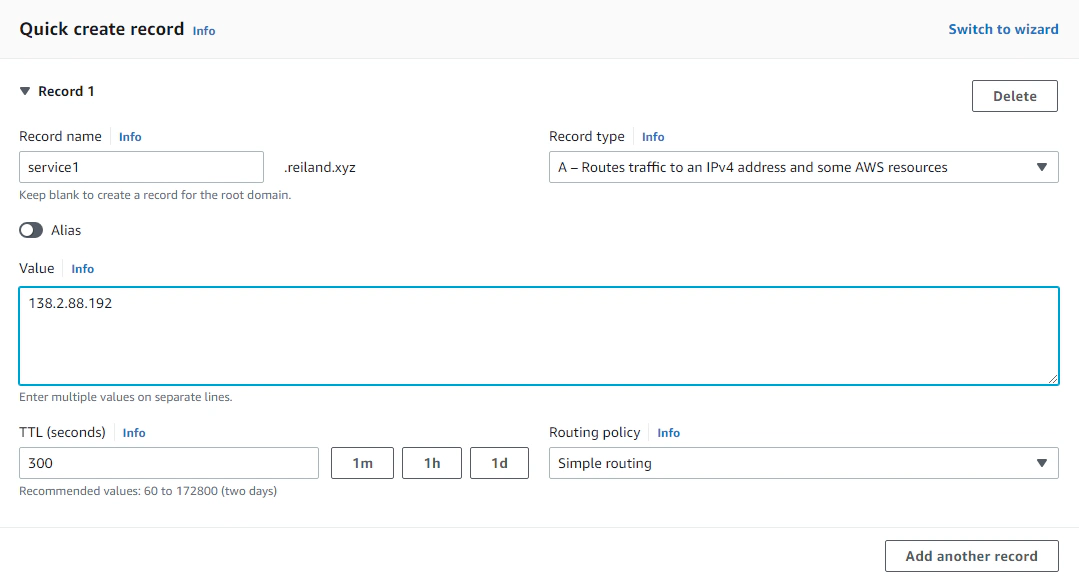
While this works out of the box, we really don’t want to have our users enter the port numbers (e.g. http://service1.example.com:8000) when trying to access our services. Also, we can run and enable HTTPS on a different port other than 443, but that is not the point here, also.. it’s ugly, just don’t.
This is where Nginx comes in. NGINX is a high performance application server that is not only used for serving pages, but also as load balancer, cache and in our usage - a reverse proxy.
A reverse proxy like Nginx is a server that acts as a middle man / router between the client and a service being requested behind it. Nginx allows routing of requests based on path or hostname, which is why it is perfect for our use particular case.
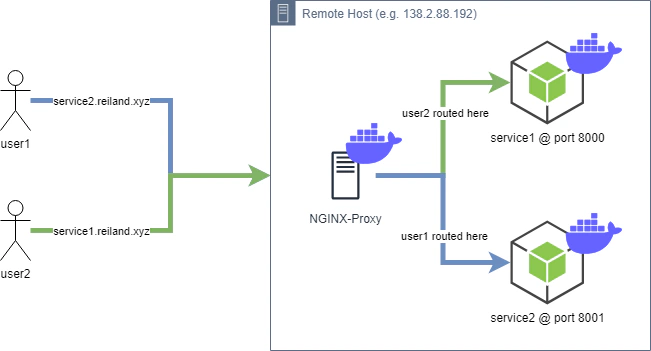
Nginx can be setup and run directly in the host machine by installing the native binaries, but to do away with creating permanent configurations and make nginx portable as well, we’re going to use the nginx docker image for running our reverse proxy.
But before we do that, we need to pass a configuration file to the nginx container give it instructions on how it’s going to handle our request and determine which of the service is being poked. Replacing <host-ip>,<host-port-mapped-to-container>, and <url>, we’ll write two server configuration blocks - one for each of the services we want to expose in nginx.
 1server {
 2
 3    set $forward_scheme http;
 4    set $server         <host-ip>;
 5    set $port           <host-port-mapped-to-container>;
 6
 7    listen 80;
 8
 9    server_name <url>;
10
11    location / {
12        add_header       X-Served-By $host;
13        proxy_set_header Host $host;
14        proxy_set_header X-Forwarded-Scheme $scheme;
15        proxy_set_header X-Forwarded-Proto  $scheme;
16        proxy_set_header X-Forwarded-For    $remote_addr;
17        proxy_set_header X-Real-IP          $remote_addr;
18        proxy_pass       $forward_scheme://$server:$port$request_uri;
19    }
20
21}
The complete nginx configuration template can be found here. We don’t need to write the complete .conf file, but we only need to follow the proper nginx config format and put our server snippets inside the http {} config blocks. Then we can save it as nginx.conf file and run our nginx docker container below.
docker run --name nginx -p 80:80 -v ~/nginx/nginx.conf:/etc/nginx/nginx.conf:ro -d nginxThe command runs our nginx, passes the configuration file we just created for our nginx container to read and exposes our services in port 80, which we can now see.
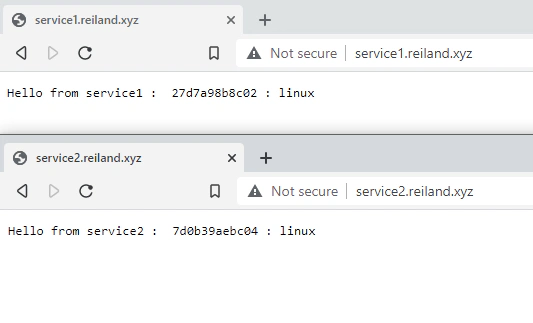
Nginx also supports SSL Termination, so that we can perform encryption in transit between clients and our server while offloading the entire process from the services being proxied. Furthermore, we can also perform SSL termination between nginx and our backend servers, but this is not necessary since they are all under the same host anyway.
For this exercise, we can request an SSL certificate using Certbot, which is a tool for automatic provisioning of SSL certificates issued by Let’s Encrypt.
It is recommended to install cerbot via snap repo, but we can also install certbot in Ubuntu, for example, from the apt repository.
sudo apt update && sudo apt install certbot -yCertbot offers a lot of ways how we can request a certificate as detailed in the certbot documentation page. But for simplicity and ease, we’re going to use standalone mode - which creates a temporary webserver listening on port 80 that Let’s Encrypt can use for validating our domain ownership.
To achieve this, we need to stop our currently running nginx first because it listens on port 80, and then run certbot while providing the --standalone flag in the command when requesting certificates for each of our services.
sudo certbot certonly --standalone -d service1.reiland.xyz -m <email-address> --agree-tossudo certbot certonly --standalone -d service2.reiland.xyz -m <email-address> --agree-tosWe should be able see a message confirming a successful issuance of our certificate.

After that, we’ll need to update the nginx.conf file we created earlier to add our newly created SSL certificates. The container does not have the /etc/letsencrypt directory inside, but we’ll be able to make our container retrieve our certificates using bind mount, like how we passed our configuration file.
 1server {
 2
 3    set $forward_scheme http;
 4    set $server         <host-ip>;
 5    set $port           <host-port-mapped-to-container>;
 6
 7    listen 80;
 8    listen 443 ssl;
 9
10    server_name <url>;
11
12    # Add SSL
13    ssl_certificate /etc/letsencrypt/live/<url>/fullchain.pem;
14    ssl_certificate_key /etc/letsencrypt/live/<url>/privkey.pem;
15
16
17
18    location / {
19        add_header       X-Served-By $host;
20        proxy_set_header Host $host;
21        proxy_set_header X-Forwarded-Scheme $scheme;
22        proxy_set_header X-Forwarded-Proto  $scheme;
23        proxy_set_header X-Forwarded-For    $remote_addr;
24        proxy_set_header X-Real-IP          $remote_addr;
25        proxy_pass       $forward_scheme://$server:$port$request_uri;
26    }
27
28    if ($scheme = "http") {
29        return 301 https://$host$request_uri;
30    }
31
32}
Lastly, we run our nginx container again, but this time, adding the bind port 443 and binding our host’s /etc/letsencrypt directory with the ro flag so that we can give our container the ability to read (but not modify) the .conf file.
docker run --name nginx -p 80:80 -p 443:443 -v ~/nginx/nginx.conf:/etc/nginx/nginx.conf:ro -v /etc/letsencrypt:/etc/letsencrypt:ro -d nginxIf we did everything right, we should be able to access our applications in the same urls we created, but this time offloading SSL termination to Nginx, making our applications run in HTTPS. So we have essentially run two different applications, running in the same port (443) yet pointed by different URLs.
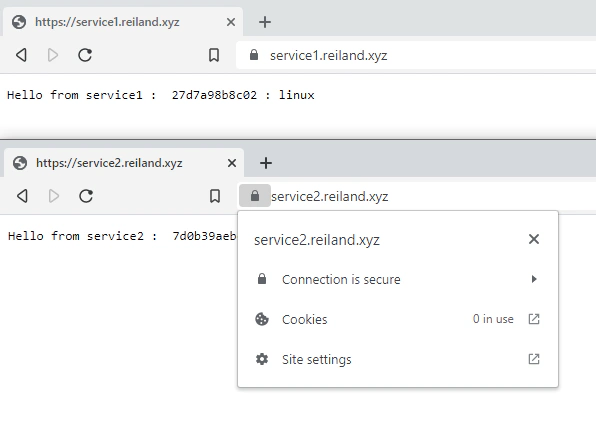
- We have run two docker applications in a single host
- Setup an Nginx as our reverse proxy to map our subdomains and route requests to relevant docker containers
- Automatically provisioned SSL certificates from Let’s Encrypt using Certbot, and configured nginx to use these certificates and enable HTTPS for our applications

Database versioning allows teams to maintain consistency within environments and encourage collaboration by enabling multiple developers to work on …

Amazon Virtual Private Cloud (VPC), allows you to create secure and logically isolated networked environments where you can deploy private …